Moldagem por embutimento a frio: Um guia completo sobre como funciona e por que é importante
Introdução
A conformação por encabeçamento a frio é muito mais do que apenas uma maneira rápida de fabricar parafusos e porcas. Trata-se de um processo de fabricação inteligente que utiliza a ciência de como os metais se comportam sob pressão. Enquanto outros métodos de fabricação cortam o material, o cold heading o empurra e molda, alterando a estrutura interna do metal para criar peças mais resistentes. Este artigo explica como funciona o cold heading para qualquer pessoa interessada em entender esse importante processo de fabricação. processo de fabricação. Veremos as ideias básicas por trás de como os metais mudam de forma e por que isso os torna mais fortes. Você conhecerá as máquinas e as operações passo a passo que transformam a teoria em produtos reais. Mais importante ainda, exploraremos como o processo altera a estrutura interna do metal, por que determinados materiais funcionam melhor do que outros e como corrigir problemas comuns que podem ocorrer durante a produção. Este guia o ajudará a entender como o encabeçamento a frio cria peças resistentes, confiáveis e econômicas.
Como os metais mudam de forma sob pressão
A compreensão do encabeçamento a frio começa com o aprendizado de como os metais se comportam quando você aplica grandes quantidades de pressão sobre eles. O processo funciona alterando permanentemente a forma do metal, e essa alteração controlada determina a aparência e o desempenho da peça final.

Mudança permanente de forma e aumento da força
Quando você aplica força a um pedaço de metal, ele primeiro se dobra de uma forma que permite que ele volte à sua forma original se você remover a força. Isso é chamado de deformação elástica. Entretanto, quando se aplica tensão suficiente para ultrapassar o limite elástico do metal, inicia-se a deformação permanente. Isso significa que o metal não voltará à sua forma original. Em um nível microscópico, isso acontece porque pequenos defeitos na estrutura cristalina do metal, chamados deslocamentos, começam a se mover e a deslizar uns sobre os outros.
À medida que a deformação continua, esses deslocamentos se multiplicam e começam a se emaranhar uns com os outros, dificultando sua movimentação. Isso é chamado de endurecimento por tensão ou endurecimento por trabalho. É cada vez mais difícil continuar deformando o material, o que o torna mais duro e resistente. Por exemplo, o endurecimento por trabalho que ocorre durante o encabeçamento a frio pode aumentar a resistência do aço comum de baixo carbono em 50-100%. Esse é um dos principais benefícios do processo, mas vem com uma desvantagem: o metal se torna menos flexível, o que deve ser cuidadosamente gerenciado ao projetar o processo.
Como funciona o fluxo de grãos
Os metais são compostos de minúsculos grãos cristalinos. No material bruto em forma de arame ou barra, esses grãos são normalmente esticados na direção em que o material foi trefilado. A direção e a continuidade desses grãos, chamadas de fluxo de grãos, têm um grande impacto sobre a resistência de uma peça.
Uma das principais vantagens do cabeçote a frio é que ele não corta esses grãos como faz a usinagem. Em vez disso, ele os força a fluir e a seguir o formato da matriz. Isso cria uma estrutura de grãos contínua e ininterrupta que segue as curvas da peça, especialmente em pontos críticos de tensão, como onde um cabeça do parafuso encontra seu eixo. Por outro lado, a usinagem corta diretamente a estrutura do grão, criando interseções nítidas que atuam como pontos fracos onde a peça pode falhar. Uma boa comparação é uma tábua moldada com a fibra da madeira (forte) em comparação com uma cortada transversalmente à fibra (fraca). A melhor maneira de entender essa vantagem é imaginar as linhas ininterruptas do fluxo de grão em uma peça com cabeça fria em comparação com as linhas de corte em uma peça usinada.
Estresse, deformação e como os materiais respondem
A curva de tensão-deformação é uma importante ferramenta de engenharia para prever como um material se comportará durante o encabeçamento a frio. Ela mostra a relação entre a tensão (força por unidade de área) aplicada a um material e a deformação resultante (deformação). O entendimento dessa curva ajuda os engenheiros a escolher os materiais certos e a projetar etapas de conformação que funcionem dentro dos limites do material.
- Região elástica: A parte inicial e reta da curva. Aqui, a deformação é temporária e o material voltará à sua forma original quando a carga for removida. A inclinação dessa linha é chamada de módulo de elasticidade.
- Ponto de rendimento: O ponto em que o material passa da deformação elástica para a permanente. Além desse ponto, ocorre a deformação permanente.
- Resistência à tração final (UTS): A tensão máxima que o material pode suportar ao ser esticado antes de começar a se estreitar e falhar. Na direção fria, as forças devem ser cuidadosamente controladas para ficar abaixo desse limite.
- Ponto de fratura: O ponto em que o material finalmente se rompe. A região entre o ponto de escoamento e o ponto de fratura representa o intervalo em que a deformação permanente pode ocorrer, que é a janela de trabalho para o cold heading.
Como funcionam as máquinas de embutimento a frio
Transformar os princípios da deformação do metal em uma peça acabada requer maquinário altamente especializado. Uma máquina de encabeçamento a frio, ou "header", é uma peça incrível de precisão mecânica, projetada para executar uma sequência de operações de conformação em velocidades incríveis.
Do fio ao espaço em branco
O processo começa com o material de arame, que é alimentado de uma grande bobina para o cabeçote. A primeira estação tem uma série de rolos de endireitamento que removem a curva da bobina, garantindo que o material fique perfeitamente reto. Logo em seguida, um mecanismo de corte corta o fio em um comprimento preciso e predeterminado. Essa peça cortada é chamada de "blank". O volume desse blank é um dos fatores mais importantes em todo o processo. Ele deve conter exatamente a quantidade certa de material necessária para preencher completamente a cavidade final da matriz. Qualquer variação significativa no volume do blank resultará em uma peça formada de forma incompleta ou em pressão excessiva que pode danificar o ferramental.
Matrizes, punções e estações
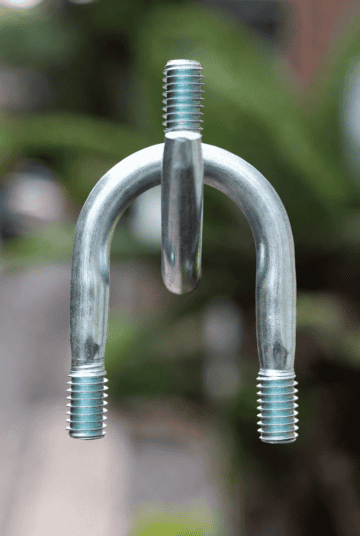
O núcleo do cabeçote consiste em um bloco de matriz estacionário e um cilindro móvel. O bloco de matrizes contém uma série de matrizes, cada uma contendo uma cavidade que representa um passo em direção ao formato final da peça. O cilindro contém uma série correspondente de punções. O processo funciona passo a passo: a peça bruta é movida da primeira estação para a primeira matriz. O punção avança, aplicando uma força enorme para remodelar a peça bruta dentro da cavidade da matriz. A peça parcialmente formada é então empurrada para fora e movida para a próxima estação, onde um conjunto diferente de matriz e punção realiza a próxima operação. Esse processo continua por várias estações - normalmente de duas a seis - com cada estação executando uma ação de conformação específica até que a forma final seja alcançada. Essa abordagem de várias estações permite a criação de formas altamente complexas, dividindo a deformação total em uma série de etapas gerenciáveis.
Principais operações de formação
Cada estação em um cabeçote é projetada para executar um tipo específico de operação de conformação. A combinação e a sequência dessas operações determinam o formato final da peça.
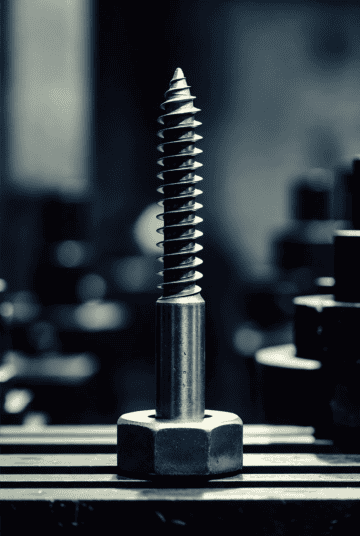
- Incomodando/levando: Essa é a operação mais básica, em que o comprimento da peça bruta é comprimido, fazendo com que o material flua para fora e aumente de diâmetro. É assim que a cabeça de um parafuso é formada. A relação entre o comprimento do material sem suporte e seu diâmetro (a relação L/D) é uma restrição crítica do projeto para evitar a flambagem.
- Extrusão frontal: Nessa operação, o punção força o material através de uma abertura da matriz que é menor do que o diâmetro inicial do blank. Isso reduz o diâmetro da peça e a torna mais longa, fazendo com que a estrutura do grão flua longitudinalmente. Isso é usado para formar o eixo de um parafuso com ressalto ou pino escalonado.
- Extrusão para trás: Aqui, o punção pressiona o material, mas, em vez de o material fluir para frente por uma abertura, ele é forçado a fluir para trás, para cima e ao redor do próprio punção. Isso é usado para criar seções ocas ou copos.
- Corte: Depois que a perturbação cria uma cabeça redonda, uma matriz de corte é frequentemente usada para cortar o excesso de material das bordas, criando um formato hexagonal, quadrado ou outro formato não circular.
- Piercing: Essa é uma operação de corte usada para fazer um furo na peça, como para um rebite oco. Normalmente, ela é realizada em uma estação final após a conclusão da conformação principal.
Tabela 1: Análise das operações primárias de direção a frio
| Operação | Ação mecânica | Efeito no material | Exemplo típico de aplicativo |
| Incomodando | Compressão axial, aumento do diâmetro. | Comprime a estrutura do grão e reúne o material. | Cabeça de um parafuso ou rosca. |
| Extrusão | Forçar o material através de um orifício menor. | Alonga a estrutura do grão e reduz o diâmetro. | Haste de um pino escalonado ou parafuso de ombro. |
| Piercing | Ação de cisalhamento para criar um furo interno. | Cria uma ruptura limpa, com fluxo mínimo de material. | Criar um furo em um rebite ou porca. |
| Corte | Cortar o excesso de material da periferia. | Remove o flash e define o formato final da cabeça. | Formação de uma cabeça sextavada em um parafuso. |
A ciência por trás de materiais mais fortes
O valor real do cold heading fica claro quando se examina o material em um nível microscópico. O processo não apenas remodela o metal; ele altera fundamentalmente sua estrutura interna, levando a melhorias significativas em seu desempenho. Esta seção vai além do simples conceito de fluxo de grãos para explorar a ciência mais profunda do material em ação.
Grãos menores e mais defeitos tornam o metal mais forte
A deformação severa que ocorre durante o encabeçamento a frio coloca uma quantidade enorme de energia no material. Isso pode causar algo chamado refinamento de grãos. Os grãos originais, maiores, são quebrados e reformados em uma estrutura de grãos muito mais fina e uniforme. O tamanho menor do grão aumenta a resistência e a tenacidade porque o maior número de limites de grão atua como obstáculo ao movimento de deslocamento.
Ao mesmo tempo, o processo aumenta drasticamente a densidade de deslocamento. Conforme discutido anteriormente, esses defeitos na estrutura cristalina se tornam emaranhados, o que é o principal motivo por trás do endurecimento por trabalho. Quanto maior a densidade de deslocamento, mais tensão é necessária para causar mais deformação, o que se traduz diretamente em maior resistência e dureza. Essencialmente, o encabeçamento a frio usa a própria estrutura cristalina do material para construir um componente mais forte por dentro, sem adicionar outros metais ou calor.
Medindo o quanto as peças ficam mais fortes
Os benefícios teóricos do encabeçamento a frio aparecem como melhorias mensuráveis nas propriedades mecânicas de uma peça. A combinação de endurecimento por trabalho e refinamento de grãos resulta em um componente que é significativamente mais forte do que o matéria-prima e também mais forte do que uma peça idêntica feita por usinagem.
Por exemplo, considere um material comum como o aço AISI 1022. Em seu estado bruto e amolecido, ele pode ter uma dureza de superfície de cerca de 75 HRB e uma resistência à tração de cerca de 450 MPa. Depois de ser usinado a frio em um fixador complexo, as áreas muito trabalhadas, como onde a cabeça encontra o eixo, podem apresentar uma dureza de superfície superior a 95 HRB e uma resistência à tração superior a 700 MPa. Além disso, o fluxo de grãos suave e contínuo criado pelo processo melhora drasticamente a vida útil à fadiga. Ao eliminar os limites de grão afiados e cortados que atuam como pontos de concentração de tensão em peças usinadas, um componente com cabeçote a frio pode suportar cargas significativamente mais repetidas antes que as trincas por fadiga comecem e se espalhem.

O papel do tratamento térmico
Embora o endurecimento por trabalho seja um dos principais benefícios, ele também pode ser uma limitação. Alguns materiais, especialmente aços inoxidáveis e ligas com alto teor de carbono, têm uma alta taxa de endurecimento por trabalho. À medida que são formadas, elas podem se tornar tão duras e frágeis que excedem a capacidade de formação do material, levando a rachaduras ou falhas catastróficas da ferramenta.
Para superar isso, tratamento térmico entre as etapas de formação é frequentemente usado. Esse é um processo de aquecimento controlado realizado entre os estágios de formação. A peça parcialmente formada é aquecida a uma temperatura específica, mantida por um período e depois resfriada. Esse processo alivia as tensões internas acumuladas durante a conformação e recristaliza a estrutura de grãos, restaurando a capacidade de flexão do material. Isso permite uma deformação ainda maior e mais severa nas estações de encabeçamento subsequentes. Por experiência, ao formar peças complexas de aço inoxidável da série 300, tratamento térmico O intervalo entre as etapas geralmente é necessário após uma redução de área para evitar que o endurecimento por trabalho ultrapasse os limites de conformação do material e da ferramenta.
Escolhendo os materiais certos
O sucesso de uma aplicação de encabeçamento a frio depende fundamentalmente da seleção do material certo. A escolha envolve um equilíbrio cuidadoso entre a capacidade do material de ser conformado e sua capacidade de atender aos requisitos de desempenho da peça final em termos de força, resistência à corrosão e tolerância à temperatura.
Principais propriedades para uma boa conformação
Nem todos os metais são adequados para a laminação a frio. O material ideal tem um conjunto específico de propriedades que lhe permite suportar deformações severas sem falhar.
- Flexibilidade / baixa relação entre rendimento e resistência à tração: A capacidade de flexão é uma medida da capacidade de um material de se deformar permanentemente antes de quebrar. Uma alta capacidade de flexão é essencial. Uma medida relacionada e mais precisa é a relação entre a resistência ao escoamento e a resistência à tração final (UTS). Uma relação baixa indica uma grande faixa de deformação permanente, o que é ideal para a conformação a frio.
- Baixa taxa de endurecimento do trabalho: Embora o endurecimento por trabalho fortaleça a peça, um material que endurece muito rapidamente exigirá forças de conformação excessivas. Isso pode levar ao desgaste precoce e à falha da ferramenta, além de exigir tratamento térmico entre as etapas, o que aumenta o custo e a complexidade.
- Composição química e qualidade: A presença de determinados elementos pode afetar significativamente a qualidade da conformação de um material. O enxofre e o fósforo, por exemplo, reduzem a capacidade de flexão e são mantidos em um nível mínimo nos aços "Heading Quality". A matéria-prima também deve estar livre de costuras internas, vazios e defeitos de superfície, pois essas imperfeições podem se tornar pontos de partida de trincas sob altas pressões de conformação.

Tipos de materiais comuns
Uma grande variedade de materiais pode ser cabeada a frio, cada um oferecendo uma combinação exclusiva de propriedades.
- Aços de baixo teor de carbono: Classes como o aço 1008/1010 são os cavalos de batalha do setor devido à sua excelente capacidade de flexão, baixo custo e resposta previsível ao endurecimento por trabalho.
- Aços-liga: Notas como 4037 O Alloy Steel ou 4140 oferece maior resistência e geralmente são selecionados para aplicações que exigem tratamento térmico subsequente para obter propriedades específicas de dureza e resistência. Eles são mais difíceis de formar do que os aços com baixo teor de carbono.
- Aços inoxidáveis: Tipos como o aço inoxidável 302/304 são escolhidos por sua resistência superior à corrosão. Eles têm uma taxa de endurecimento por trabalho muito alta, o que dificulta a sua conformação e, muitas vezes, exige lubrificantes e ferramentas especiais.
- Ligas de alumínio: Ligas como o alumínio 6061 oferecem uma excelente relação resistência/peso e boa resistência à corrosão, o que as torna ideais para aplicações aeroespaciais e automotivas.
- Cobre e latão: Essas ligas são selecionadas por sua excelente condutividade elétrica e resistência à corrosão, principalmente para terminais e conectores elétricos.
Tabela 2: Guia técnico para materiais de revestimento de frio comum
| Classe de material | Grau(s) específico(s) | Principais características técnicas | Classificação de formabilidade | Aplicativos comuns |
| Aço com baixo teor de carbono | AISI 1008, 1018, 1022 | Excelente ductilidade, baixo custo, boa resposta ao endurecimento por trabalho. | Excelente | Parafusos padrão, rebites, fixadores simples. |
| Aço-liga | AISI 4037, 4140, 8620 | Maior resistência, requer recozimento para formas complexas, adequado para tratamento térmico. | Bom a razoável | Parafusos estruturais de alta resistência, componentes automotivos. |
| Aço inoxidável | 302HQ, 304, 316 | Alta resistência à corrosão, alta taxa de endurecimento por trabalho, requer lubrificantes especiais. | Justo | Fixadores para uso marítimo, médico e alimentício. |
| Ligas de alumínio | 2024, 6061, 7075 | Leve, com boa resistência à corrosão e força moderada. O 2024 é forte, mas menos moldável. | Bom (6061) | Fixadores aeroespaciais, peças automotivas leves. |
| Ligas de cobre | Latão, cobre C110 | Excelente condutividade elétrica, boa conformabilidade e resistência à corrosão. | Excelente | Terminais elétricos, conectores, rebites decorativos. |
Correção de problemas comuns
Mesmo com um processo bem projetado, podem ocorrer defeitos na produção de cabeçotes a frio. Um engenheiro experiente pode diagnosticar esses problemas conectando o defeito visível aos princípios subjacentes da ciência dos materiais, das ferramentas e da configuração da máquina. Esta seção fornece uma estrutura prática para identificar e solucionar modos de falha comuns.
Uma abordagem de solução de problemas passo a passo
A solução eficaz de problemas exige uma abordagem sistemática em vez de ajustes aleatórios. Quando um defeito é identificado, a investigação deve prosseguir em uma ordem lógica:
- Analisar o defeito: Descreva a aparência do defeito, a localização e a frequência com que ele ocorre.
- Examinar o material: Verifique se a matéria-prima tem o grau correto e se está livre de falhas pré-existentes, como costuras ou inconsistências químicas.
- Inspecione o ferramental: Verifique se há desgaste, lascas ou acúmulo de matrizes e punções.
- Revise a configuração da máquina: Confirme se parâmetros como o comprimento do blank, o alinhamento da ferramenta e o tempo de transferência estão corretos.
Compreensão dos tipos de falha
A maioria dos defeitos pode ser atribuída a algumas causas técnicas principais. Ao compreender a física por trás de cada modo de falha, é possível implementar ações corretivas direcionadas.
- Cabeças rachadas: As rachaduras na superfície da cabeça são um sinal clássico de que a capacidade de flexão do material foi excedida. Isso pode ser causado pela tentativa de deformação excessiva em uma única estação, por um material com alta taxa de endurecimento por trabalho ou pela presença de costuras no fio bruto que se abrem sob pressão.
- Preenchimento incompleto: Quando os cantos ou detalhes de uma cabeça não estão totalmente formados, isso indica que o material não preencheu completamente a cavidade da matriz. Na maioria das vezes, isso é causado por volume insuficiente do blank (o blank foi cortado muito curto). Também pode ser resultado de lubrificante preso, criando uma pressão que impede o fluxo total do material, ou simplesmente de uma cavidade de matriz desgastada que agora está superdimensionada.
- Dobras de superfície/voltas: Esses defeitos aparecem como uma costura na superfície em que uma pequena parte do material se dobrou sobre si mesma em vez de se comprimir suavemente. Normalmente, esse é um problema de projeto da ferramenta, em que o formato do raio de entrada do punção ou da matriz causa um fluxo inadequado de material durante uma operação de revolvimento.
- Marcas de ferramentas/estilhaçamento: O engripamento é a transferência de material entre a peça de trabalho e a superfície da ferramenta, resultando em arranhões e em um acabamento ruim. Isso é uma falha de lubrificação. As pressões extremas no cabeçote a frio exigem uma forte camada limite de lubrificante. Se essa camada se romper devido a lubrificante insuficiente, tipo de lubrificante incorreto ou calor excessivo, ocorrerá contato metal-metal.
Tabela 3: Matriz de solução de problemas para defeitos de inclinação a frio
| Defeito | Identificação visual | Causa(s) técnica(s) provável(is) | Ação(ões) corretiva(s) recomendada(s) |
| Rachaduras na cabeça | Fissuras ou rachaduras na superfície ou na periferia da cabeça. | 1. Limite de formabilidade do material excedido. <br> 2. O endurecimento por trabalho é muito rápido. <br> 3. Costuras ou falhas no arame cru. | 1. Mudar para um material mais dúctil. <br> 2. Adicione um recozimento em processo. <br> 3. Melhorar a inspeção da matéria-prima. |
| Preenchimento incompleto | Os cantos da cabeça são arredondados ou não estão totalmente formados. | 1. Volume em branco incorreto (muito curto). <br> 2. Retenção excessiva de lubrificante. <br> 3. Cavidade da matriz desgastada. | 1. Ajuste o comprimento da tesoura. <br> 2. Adicione aberturas de ventilação ao ferramental; use lubrificante de baixa viscosidade. <br> 3. Substitua ou refaça a matriz. |
| Dobras de superfície | Uma dobra ou costura na superfície onde o material se dobrou sobre si mesmo. | 1. Projeto de matriz/perfurador ruim, causando fluxo inadequado. <br> 2. Lubrificação excessiva. | 1. Redesenhar a face do punção ou o raio de entrada da matriz. <br> 2. Otimize a aplicação do lubrificante. |
| Galgamento de ferramentas | Arranhões ou transferência de material da peça para a ferramenta (ou vice-versa). | 1. Rompimento da camada limite do lubrificante. <br> 2. Material ou revestimento da ferramenta incorreto para a peça de trabalho. | 1. Use um lubrificante de alta pressão (por exemplo, sabão de fosfato). <br> 2. Use TiN ou outros revestimentos PVD nas ferramentas. |
Conclusão
A conformação por encabeçamento a frio demonstra o poder da ciência de materiais aplicada. É um processo em que um profundo entendimento de como as propriedades do material, a geometria da ferramenta e a física do processo trabalham juntas não é apenas útil, mas essencial para o sucesso. Ao controlar a deformação permanente do metal em um nível microscópico, podemos obter resultados impossíveis com outros métodos. Os principais benefícios - resistência superior do componente devido ao endurecimento por trabalho, vida útil excepcional à fadiga devido ao fluxo ininterrupto de grãos e eficiência de produção notável - decorrem diretamente desses princípios fundamentais. Quando seus fundamentos técnicos são compreendidos e aplicados com competência, o cabeamento a frio é um método de fabricação de primeira linha para a produção de componentes de alto desempenho e formato preciso, projetados para proporcionar confiabilidade e longa vida útil.
- Notícias do MIT - Manufatura e Materiais https://news.mit.edu/topic/manufacturing
- UC Berkeley - Pesquisa de fabricação https://me.berkeley.edu/research-areas-and-major-fields/manufacturing/
- SME - Sociedade de Engenheiros de Manufatura https://www.sme.org/
- Universidade de Stuttgart - Instituto de Tecnologia de Conformação de Metais https://www.ifu.uni-stuttgart.de/en/
- RWTH Aachen - Instituto de Conformação de Metais https://www.ibf.rwth-aachen.de/go/id/pepy/lidx/1
- Universidade de Nottingham - Pesquisa de conformação de metais https://www.nottingham.ac.uk/research/groups/advanced-manufacturing-technology-research-group/
- Manufacturing USA - Rede de Institutos https://www.manufacturingusa.com/institutes
- Caltech - Notícias sobre Ciência dos Materiais https://www.caltech.edu/about/news
- ResearchGate - Tópicos de engenharia de manufatura https://www.researchgate.net/topic/Manufacturing-Engineering
- Sociedade de Mineração, Metalurgia e Exploração https://www.smenet.org/